
After selecting the required state variable, you will see a dialog box with an explanation of how to define the section course.
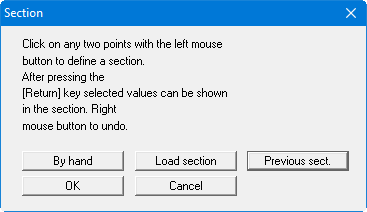
With this evaluation method, the section course is no longer tied to nodes, but consists of a start and end point.
With the "By hand" button you can enter the start and end points as numerical values directly, without having to use the mouse.
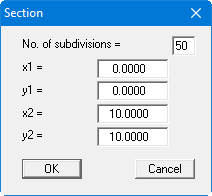
The no. of subdivisions defines at how many points section values are to be calculated.
If you want to define the section graphically, click "OK". You can click the start and end points at any location using the mouse. You can enter the number of subdivisions in the subsequent dialog box.
If you have previously saved a section you can reload it using "Load section". The "Previous sect." button is only available if a section has already been defined.
After leaving the dialog box for defining the section by hand or defining the subdivisions for the other methods by pressing "OK", a dialog box opens in which you can click and enter settings for section visualisation.

You can now specify whether the section should be displayed in colour. If you do not require a colour-filled section, you can display a thicker section line, for example, using the "Pen width" input box. You can adapt the colour settings for the colour fill or section line to suit your needs using the "Edit colour" button.
You can also define the intercept of the x-axis with the y-axis for a normal section visualisation by specifying "y0 =". In this case the "Use" check box must be activated. If you do not use this option, the x axis will intercept the y axis at the smallest occurring y value.
Your system can also be visualised as a fence diagram by activating the "As fence diagram" check box. In the corresponding input box, enter the maximum length to be displayed.
Using the "Save section" button, you can save your section to a file so that the exact section is available again via the "Load section" button in the dialog box at a later date.