
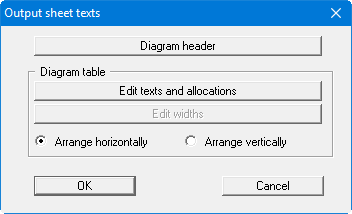
The default labelling of some output sheet elements can be edited in this menu item's dialog box. Among other things, the name of the output sheet can be specified here. An option box opens in which the various fields can be selected for editing using the correspondingly labelled buttons.
After clicking the "Diagram header" button the following dialog box opens:
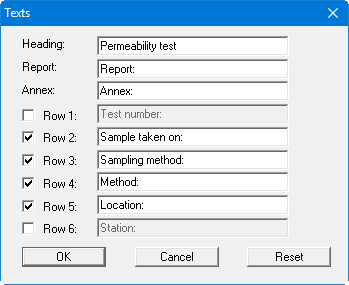
Your input in lines 1 to 6 of the above dialog box, as well as the input for "Report:" and "Annex:" also represent the designations for the input boxes in the "Edit/General" menu item dialog box. If lines are deactivated in the above dialog box, the corresponding input boxes in the "Edit/General" menu item dialog box are also deactivated .
Use "Reset" to restore the default labelling settings. If you have retroactively changed the language you will see the internal program translations in the input boxes.
In the "Diagram table" group box in the above "Texts + table" dialog box the required texts, text allocations and type of visualisation can be edited.
-
"Edit texts and allocation"
A dialog box opens for specifying the parameters and properties to be displayed in the diagram table. It is possible to display up to a maximum of 17 lines. The sequence corresponds to the numbering in the following dialog box.
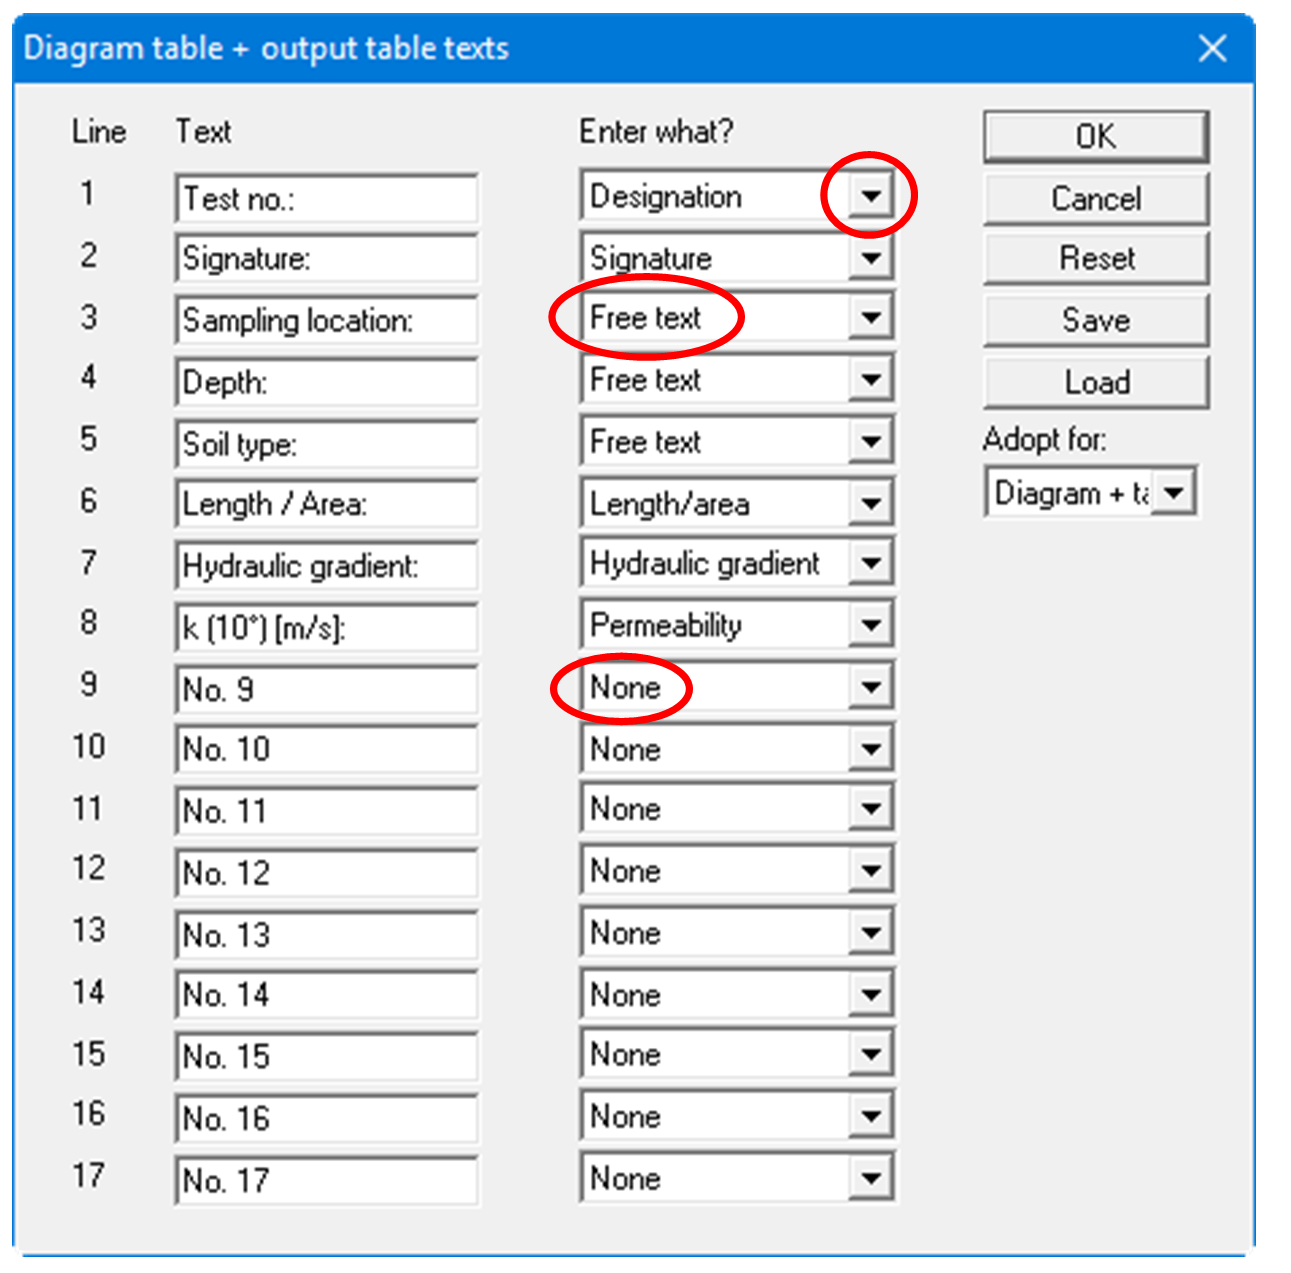
In the "Text" boxes a text must be entered by hand which is later used as a description. After clicking the arrows in the "Enter what?" column the values or text in the drop-down list entered or determined by the program can be allocated to the to the rows of the diagram table. Lines with a "None" allocation are not displayed.
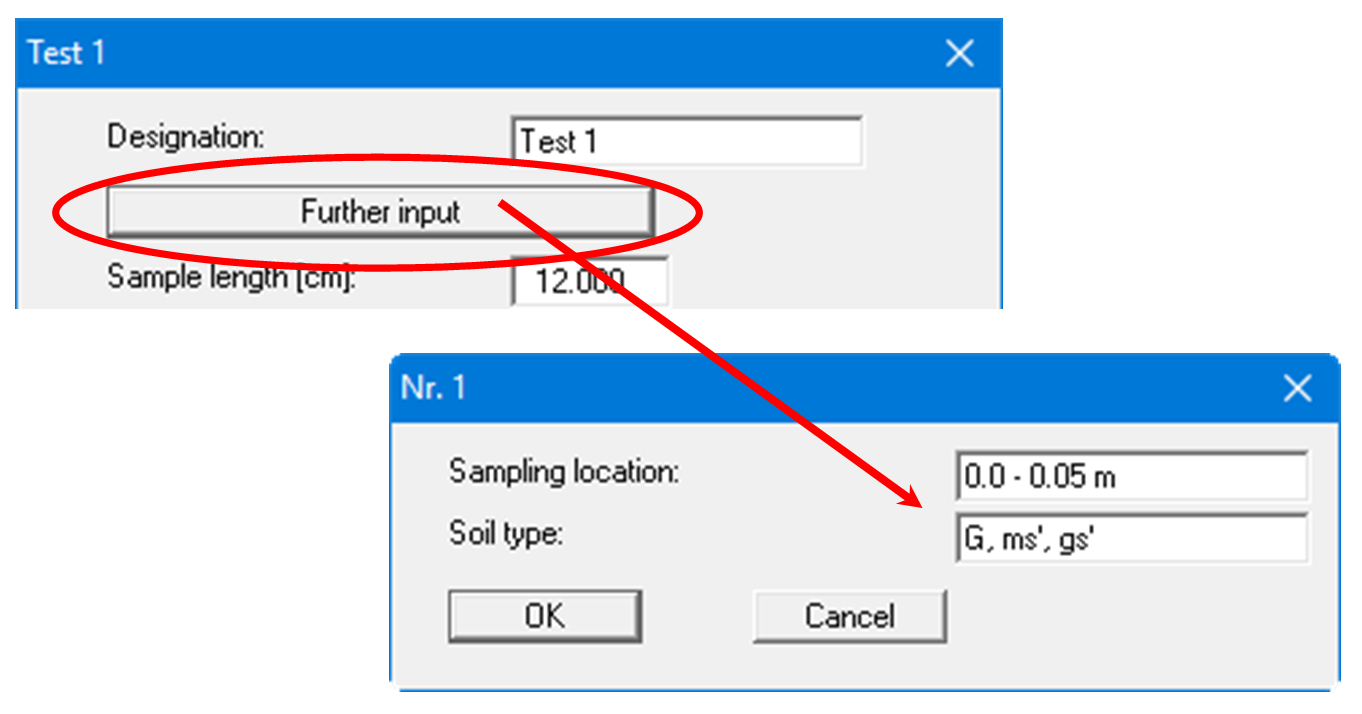
If information needs to be added to the table that is not found in the default texts in the table, a "Free text" can be used. In the menu items "Edit/Constant tests" or "Edit/Falling tests" you will then see an additional "Further input" button and can enter text according to your requirements in the dialog box.
The "Reset" button resets the labelling and allocations of the results table to the defaults. If you have retroactively changed the language you will get the internal program translations. Your texts and allocation can be saved in a "*.ktx" file using the "Save" button and opened again using the "Load" button. In addition, you can specify whether the current texts and properties allocations
-
"Edit widths"
If the table is arranged vertically, a fixed width for each column can be defined using this button. Please note, however, that the total width of the table needs to fit into the layout of your output sheet. In order to achieve a uniform distribution within the specified total width, e.g. as defined using [F11], click the "All the same width" button. -
"Arrange horizontally"/"Arrange vertically"
This command button defines the alignment of the diagram table.