
In rare cases it may be desirable to use soil hatching other than those prescribed by DIN. In this case it is possible to create a stratigraphic log fill using bitmaps. These bitmaps (in WINDOWS BMP format) can be created using, e.g., the "Paintbrush" program, which is installed with every WINDOWS installation. This file format can also be created with other WINDOWS graphics programs (e.g. Corel-Draw). Further to this, you have the possibility of creating bitmap templates with the help of a scanner.
Filling of a log with a bitmap graphic is done by entering the appropriate code number during layer input (see below). The abbreviations and code numbers contained in the "SEPKURZ-e.TXT" file can be edited or supplemented in order to allocate the bitmaps to abbreviations and thus to long and short texts.
For filling of stratigraphic logs with user-defined bitmaps the code numbers 901 to 999 are available. Correspondingly, the dialog box contains a continuous, non-editable numbering from 901 upwards. The code numbers 901 to 918 are predefined by default for a variety of rock types. The bitmaps are saved in the "Bitmaps" folder on the program level. The code number allocations are saved in the "GGU-STRATIG.bit" file and are loaded when the program is started. If you open files created using older program versions, it may be necessary to first load the "GGU-STRATIG.bit" file to achieve correct rock visualisation.
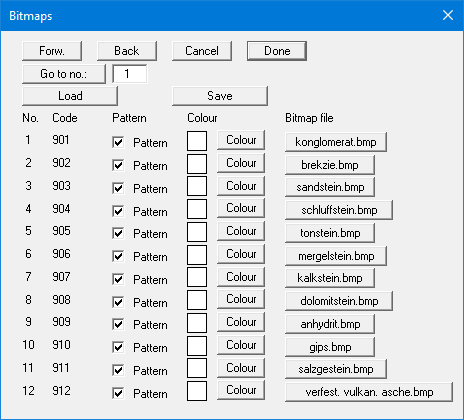
After clicking on the action button after each code number a file requester box opens with which you can allocate a code number to a bitmap file. The bitmap file must be in the "Bitmaps" folder, which is on the program level (e.g. "C:\All programs\GGU-Software\GGU-STRATIG\Bitmaps").
Bitmap graphics have a defined width and height when created, e.g. with "Paintbrush". The program increases or reduces this width to the width of the stratigraphic log when you select the "Pattern" check box. The resulting height of the bitmap presentation in the stratigraphic log is then determined automatically. In this manner a vertically displaced hatching is repeated until the layer is filled. If the "Pattern" check box is deactivated, the bitmap will be stretched or compressed to the full height of the soil layer.
User-defined bitmaps will only be displayed on the screen, exactly the same as for default soil signatures, if the "Screen display with soil signatures" check box is activated in the "Graphics preferences/Preferences" menu item. They will, however, be entered when printing the stratigraphic logs, independently of the setting of this check box.
In principle, bitmaps can also be used in colour. Problems may occur if you try to send such a bitmap to an output device which is not capable of colour output. Quite often, ugly grey scales will be the result. In order to achieve higher flexibility, there is a "Colour" button behind each bitmap file, with which you can allocate a colour to the bitmap. This colour will only be entered when the "Colour fill for logs" check box is activated, in the menu item "Preferences/General". Each selected colour will be shown in the dialog box.
You can save the bitmaps in a file with suffix ".bit" or load a ".bit" file. If you select
"GGU-STRATIG.bit" as file name and save the file on the same level as the GGU-STRATIG program, the saved bitmaps and colours will be automatically loaded at the next program start.