
Several general display settings can be specified using this menu item. The changed settings are always available when the program starts if they are saved in the "GGU-STRATIG.alg" file in the program folder using the menu item "Preferences/Save graphics preferences" .
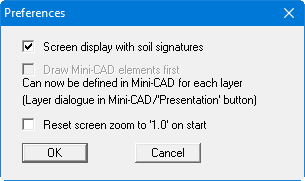
You will see the following dialog box:
-
"Screen display with soil signatures"
In the default setting the soil signatures and hatchings used in the stratigraphic logs are displayed in the screen output. This may produce a long delay in screen build-up for very large layer polygons, for example. Deactivate the check box to remove the soil signatures in the screen display. The check box should be always activated if you have allocated user-defined hatching codes to your soil strata. This hatching is treated like soil signatures. Otherwise, it may appear to you that the program has not implemented your hatching data.
Drawing output to a printer or a file is not impacted by the above setting; here, output always includes the soil signatures and hatchings. If soil signatures are not required on your printout the "Show signatures" check box in the "Preferences/General" menu item dialog
-
"Draw Mini-CAD elements first" - This check box can no longer be selected!
Originally, you could influence the sequence of presentation using this button. Mini-CAD elements are in the default setting of the program above the elements you define via the "Input" menu, so can cover stratigraphic logs, dynamic probings, etc. From version 7 of the integrated Mini-CAD module you can now work on a total of 20 different levels. Place Mini-CAD objects that are to be drawn behind the elements of the main program on a separate layer. Click the "Layers" icon in the Mini-CAD pop-up menu and deactivate the required layer in the dialog box for the "Visualisation" button. The Mini-CAD elements of this layer are then drawn first, e.g. they are located behind your stratigraphic log.
Elements drawn with "Header CAD" can be placed behind the main graphics in the same way using the "Layers" icon, "Visualisation" button in the "Header CAD" pop-up menu.
-
"Reset screen zoom to '1.0' on start"
If the check box is deactivated and you have zoomed into your current log visualisation, the zoom is retained when you open a new file. You see the same screen content in the newly opened file. If you regularly open new files while zooming, but still want to see it in its entirety, activate this check box.