
If you have already drawn some Mini-CAD objects, you must now decide, after selecting the "DXF import" icon, whether the DXF data are to be added ("Additional" button) or first the existing objects be deleted ("New" button). You can also move to a different drawing layer first, before beginning the DXF import (see “Mini-CAD System preferences: Layer preferences"). You will then see a dialog box in which you can define import preferences.

If you encounter problems when importing fonts from the DXF file, e.g. special characters are not correctly represented, you may be able to achieve better results by deactivating the "Texts in DXF file in OEM format" check box or by applying a font size factor. If colour fill does not need to be imported, activate the "Command "TRACE" and "SOLID" without fill" check box. If coloured lines or texts are to be imported from the DXF file, deactivate the "Use" check box for the appropriate standards.
When you now click on "OK" you can select the DXF file to be imported. The program interprets the DXF commands and converts them to Mini-CAD objects. You will then see a dialog box like this one:
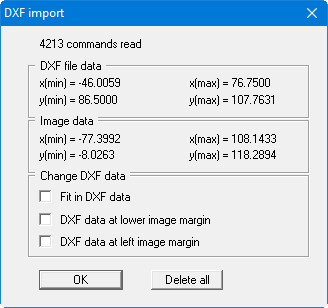
At the top of this box, you can see information on the dimensions of the DXF file and the image data for your current project. Normally, the DXF data are transferred with the correct coordinates. You should therefore deactivate the tick in the "Change DXF data" group box.
When the data are imported, the objects are drawn at the transferred positions in your project's coordinate system. Press the [F9] (optimise coordinates) function key once to optimise the display. During coordinate optimisation, the font sizes are often disproportionately enlarged or reduced. Simply import the same DXF file a second time. Because the scale is already adjusted, the texts are now also displayed with the correct font size.
If you click the "Delete all" button in the dialog box above, the data in the current DXF file will not be imported.