
Activate the "Text" ![]()
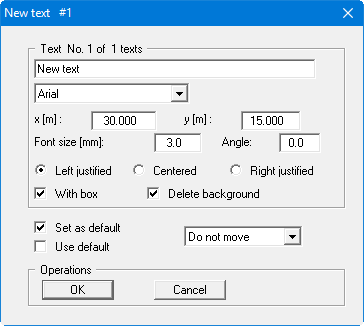
To use these preferences for further text, activate the "Set as default" check box. When you then enter the next text, these preferences will already be activated as default. Subsequent adjustment of existing texts can be carried out by means of the "Use default" check box.
The colour used for a new text is defined by your choice of pen (see “Mini-CAD System preferences: Pen preferences and pen selection"). Depending on the preferences for the selected pen it is thus possible to display text in a given colour directly at input. If an existing text is subsequently edited the dialog box shown above is extended by a "Colour" button, allowing the colour of the selected text to be edited (see “Editing Mini-CAD objects: Editor box for a text”).
The current drawing layer is shown in the blue dialog box title bar by “#1”. That is, you are now in layer 1. New text can also be directly inserted in other layers by selecting a different layer in the "Do not move" drop-down list box. The new text is then placed in the selected layer, but you remain in the current drawing layer.