GGU-FIELDCAPACITY: Entering samples
You edit the samples of a project via the menu Edit / Samples (key F6). Each sample becomes one column on the evaluation sheet.
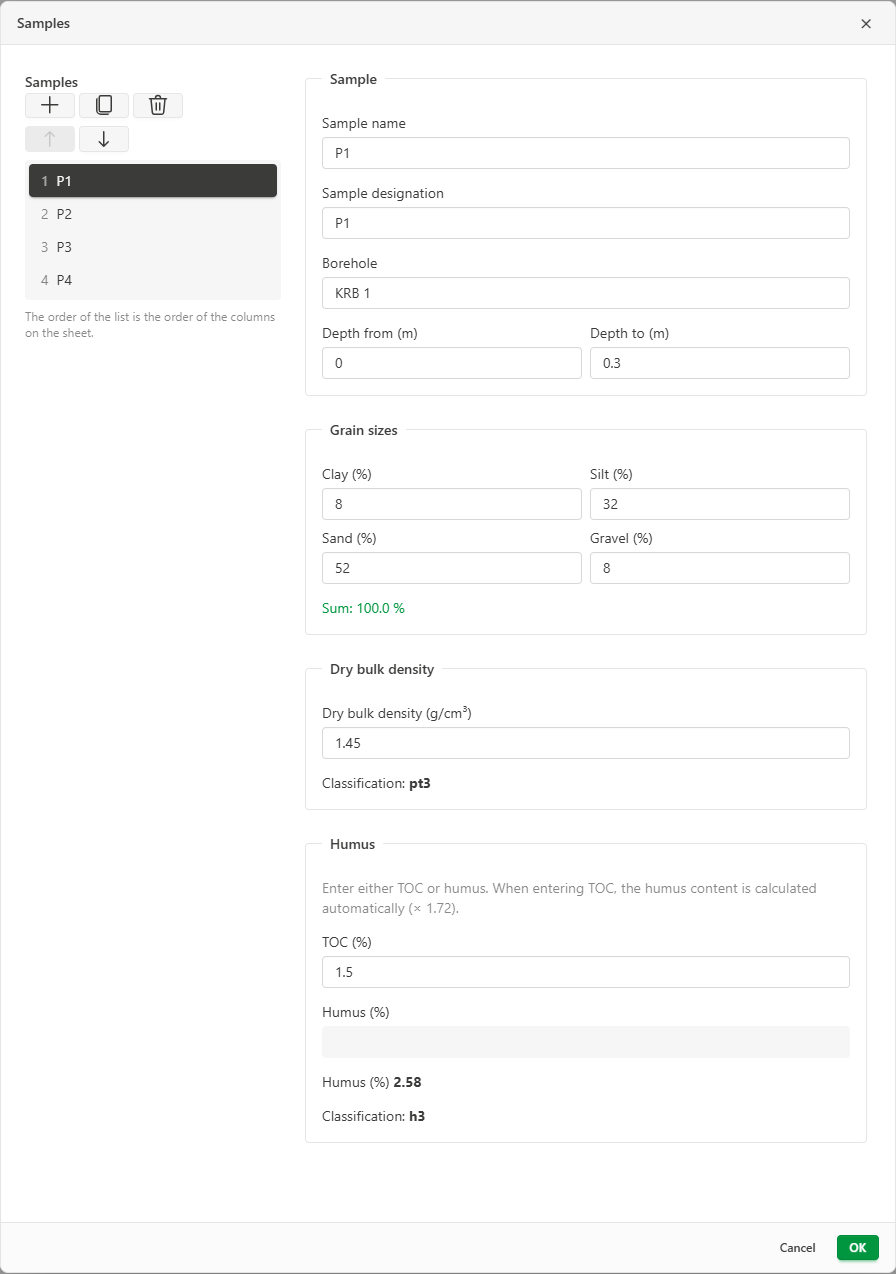
The dialog works on a copy: your changes are only applied with OK. Cancel discards them.
Sample list
The list of samples is on the left. The order of the list is the order of the columns on the sheet. The buttons above the list let you:
- add a sample (+),
- duplicate the selected sample, for example to create a second sample from the same borehole with similar values,
- remove the selected sample (one sample always remains),
- move the selected sample up or down.
At most six samples fit on one evaluation sheet. Once that number is reached, no further samples can be added or duplicated.
Sample section
| Field | Meaning |
|---|---|
| Sample name | Short name of the sample; it heads the sample's column on the sheet. If left empty, the column shows "Sample 1", "Sample 2" and so on. |
| Borehole | Exploration point the sample comes from. |
| Depth from (m), Depth to (m) | Sampling depth in metres. |
Above the sample data the type Sample or Mixed sample is shown. Mixed samples come only from GGU-CONNECT; for them Borehole and the depths are omitted, because they come from several sampling points.
Samples from GGU-CONNECT
Samples that you imported from GGU-CONNECT (see Exchanging data with GGU-CONNECT) also show:
- a lock on every value that comes from GGU-CONNECT. These values are protected against accidental changes. Click the lock to unlock the value; if you then change it, it counts as your own input. If you do not change it, it is locked again the next time you open the dialog.
- an orange dot in the sample list and the note Done in GGU-CONNECT if the sample's KA5 experiment is already marked as done there. Handing it over again overwrites the results in GGU-CONNECT.
Grain sizes section
Enter the mass percentages of Clay, Silt, Sand and Gravel, for example from a sieve and sedimentation analysis. Below the fields the program shows the running total. It should be 100 %; if it is higher, even by only 0.1 %, it is shown in red and the program does not calculate any parameters for this sample. A total below 100 % does not stop the calculation.
For gravel-free soils, enter 0 for Gravel. If the field is left empty, the program still determines the soil type, but it does not calculate the field capacity, air capacity and available field capacity of the soil, because these need the gravel content.
The soil type according to KA5 follows from clay, silt and sand. How the program takes the gravel content out of the calculation is described in Calculation according to KA5.
Dry bulk density section
Enter the dry bulk density in g/cm³. Below it the program shows the classification according to KA5:
| Classification | Dry bulk density |
|---|---|
| pt1 | below 1.2 g/cm³ |
| pt2 | 1.2 to below 1.4 g/cm³ |
| pt3 | 1.4 to below 1.6 g/cm³ |
| pt4 | 1.6 to below 1.8 g/cm³ |
| pt5 | 1.8 g/cm³ and above |
Humus section
Enter either the TOC content or the humus content in mass %. As soon as one of the two fields has a value, the other is locked. From the TOC content the program calculates the humus content with the factor 1.72. Below it the classification according to KA5 is shown:
| Classification | Humus content |
|---|---|
| h0 | 0 % |
| h1 | above 0 to below 1 % |
| h2 | 1 to below 2 % |
| h3 | 2 to below 4 % |
| h4 | 4 to below 8 % |
| h5 | 8 to below 15 % |
| h6 | 15 to below 30 % |
| h7 | 30 % and above |
A surcharge for organic matter applies only to the classes h2 to h5 (see Calculation according to KA5). Without any humus data the program calculates without a surcharge.
Your own entries section
If you have created your own rows under Edit / Evaluation sheet rows, this section appears with one input field per row. The text you enter appears on the sheet in the sample's column. How to create your own rows is described under Evaluation sheet.